


Introduction
When you have Canon as your printer, you are aware of the excellent performance the printer generates, from the sharp text documents to the brilliant photographs. You, too, have felt the horror of the low ink warning, or the low toner warning, and then the simultaneous lamentation of the probable expense of new cartridges. OEM (Original Equipment Manufacturer) cartridges are costly and may have you feeling that they are as expensive as the printer. It is a widely held aggravation, and it is probably why you have come here.
You have asked yourself how it can be better. Is it possible to get out of the rut of costly replacements at the cost of quality? To this question, I would say a decided yes. You are now welcome to your ultimate guide to refilling Canon cartridges.
This does not only mean saving on money, but it is an informed choice. We are going to take you through all you need to know, whether you use a PIXMA inkjet printer whose ink is liquid or an imageCLASS laser printer, which uses toner powder. We will discuss the clear advantages and disadvantages, give two different detailed step-by-step instructions on how to refill an ink cartridge and a toner cartridge and provide high-quality alternatives that will give you peace of mind. We strive to ensure that you have the knowledge to make the most intelligent, cost-effective choice to satisfy your printing requirements.
Is Refilling Worth It? A Look at the Pros and Cons
The Pros: The Allure of Savings and Sustainability
It would be an impressive cost-saving point to refill. On average, a Do-It-Yourself (DIY) refill will be able to save you up to 50 to 70 percent against purchasing a new OEM cartridge. Within a small office or even a family that frequently prints, these savings may accumulate to hundreds of dollars annually. The ink or toner powder in a bottle can frequently provide several refills; therefore, the cost-per-page goes down to very few pennies.
In addition to the financial advantage, refilling is a responsible decision as far as ecology is concerned. It is estimated that hundreds of millions of ink and toner cartridges are discarded each year, which end up in the landfill and can take many centuries to degrade. Every cartridge that you refill saves you one less plastic and metal garbage. It is a simple step, though it makes a huge difference to our Earth.
The Cons: The Reality of Risk, Time, and Quality
The major disadvantage is its riskiness. It is a dirty process, particularly for first-timers. Spills of ink may stain, and ink-based powers such as toner need to be carefully handled because they can cause irritation when inhaled. Worse, using the wrong ink or toner or incorrect refilling may cause the printer severe issues. It may be as small as streaky prints or as significant as a clogged print head in an ink jet printer or a blown drum in a laser printer, one that potentially would wipe out any savings you might have gotten in the repair.
And there is the print quality, too. Though the refill materials may receive high quality, the same may fail to fit the specific color calibration and consistency as the OEM cartridges perfectly. As a professional photographer or a graphic designer, this possible variation may not be tolerable.
Lastly, refilling is with time and patience. It is a manual process where details are to be considered. You also need to take into consideration the idea that most of the newer cartridges have intelligent chips that measure the amount of ink or toner. The printer may continue to recognize the cartridge as empty even after a refill, and you will have to choose to disregard the messages or carry out the manual reset.
The final verdict as to whether you should refill is your priorities. In case you are on a mission to save as much money as cost and contribute to environmental awareness, and the process does not seem to bother you, then refilling is the right choice to make. In case you value certainty of quality, convenience, and peace of mind, then you should look at other options.
Before You Start: Identify Your Cartridge
The most important initial step to take before going through any guide would be to get the right idea as to which type of cartridge your Canon printer takes. Ink and toner refilling also have absolutely no similarities, and attempting to solve using the wrong guide will only be frustrating and a waste of time.
It is simply like mounting a car: you cannot add diesel to a gas-powered engine. Likewise, you cannot pour liquid ink into a powder cartridge.

Ink Cartridges (for Inkjet Printers)
- Printer Models: If you have a printer from the Canon PIXMA, MAXIFY, or TR/TS series, you are using ink cartridges.
- How They Work: These printers blast the paper with microscopic water-based dots of liquid ink. These cartridges are generally small plastic boxes that are rectangular in shape, with one cartridge black and one to two cartridges in color.
- The Refill: This is by inserting a liquid ink into the cartridge’s built-in sponge.
Toner Cartridges (for Laser Printers)
- Printer Models: If you own a Canon imageCLASS, i-SENSYS, or Satera series printer, you are using toner cartridges.
- How They Work: These printers have a laser beam that is used to produce an electrostatic picture on a rotating drum. This image is attracted towards a fine, dry powder known as toner, which is subsequently fused onto the paper with heat. Highly oversized and complicated toner cartridges are much bigger and more elaborate than the ink cartridges.
- The Refill: This is done by filling a hopper in the cartridge with toner powder, and usually, it entails replacing a smart chip.Make sure of the model of your printer. Having ascertained whether it is an inkjet or laser printer device, you can use one of the following guides below.
Guide 1: How to Refill Canon INK Cartridges (For Inkjet Printers)
Canon printer cartridge refill is a straightforward process, but it requires a delicate touch and proper preparation. Follow these steps carefully for a successful, mess-free refill.
Tools & Materials Needed for an Ink Refill
- Ink Refill Kit: Choose a kit specifically designed for your Canon cartridge model. It is also supposed to be equipped with bottles of high-quality ink (Black, Cyan, Magenta, Yellow, as required) and correctly sized syringes with each of the colors.
- Disposable Gloves: Necessary to ensure that your hands are clean.
- Paper Towels or Old Newspaper: To protect and prevent spills on your work surface.
- A Small Drill Tool or Thumb Drill: Often included in a Canon ink cartridge refill kit, used to create a fill hole.
- Clear Tape or a Hot Glue Gun: To seal the fill hole once it was refilled.
The Step-by-Step Ink Refill Process
- Prepare Your Workspace: Spread some paper towels or newspaper on a steady, stable surface in a well-illuminated place. Wear your disposables.
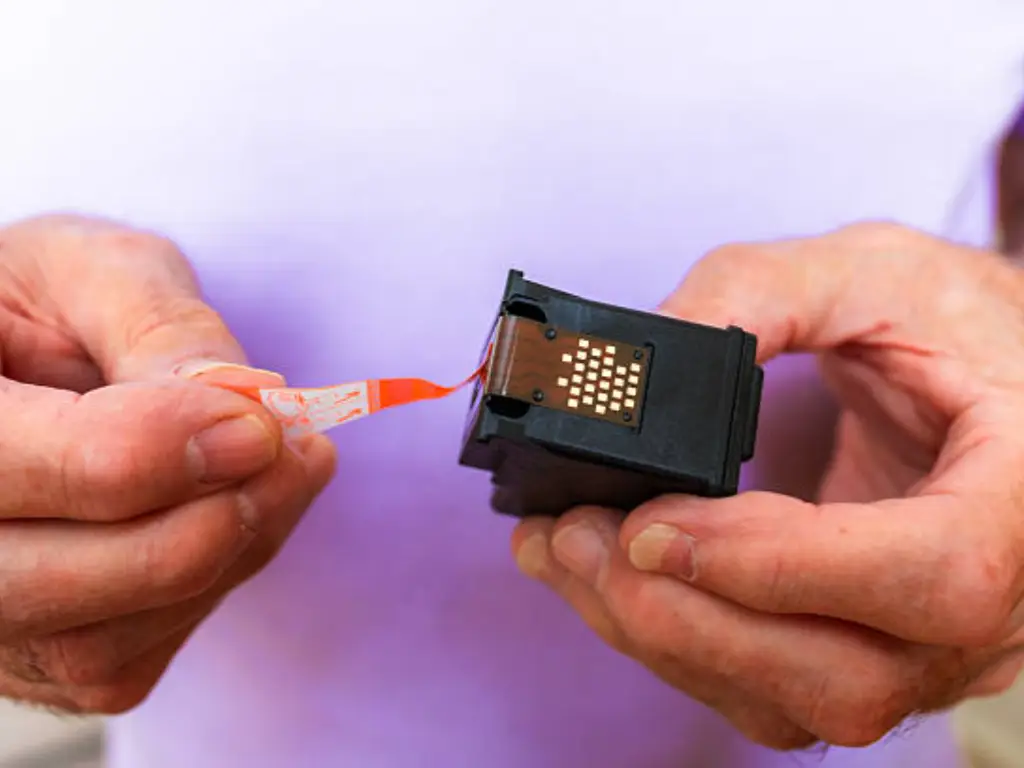
- Remove the Cartridge: Turn on your printer and open the cover to access the cartridges. Wait for the carriage to move to the center, then gently push down on the cartridge you wish to refill and pull it out.
- Locate the Fill Hole: Put the cartridge on your desktop. Strip the cartridge top label off. Here, one or more circular depressions of small size will be observed. These are the fill holes (a black cartridge has one; a color cartridge has three). Not to worry, in the event that there is no hole, you will be able to use your thumb drill to gently make a tiny hole in either of the depressions. Be weeting, and you would not want to break the inside sponge.
- Draw the Ink: Uncap the ink bottle of the corresponding color. Fill the syringe through the bottle and press the clean needle inside slowly, almost 3-5ml of ink (in a smaller cartridge) or 8-10ml (in a large XL cartridge). It’s better to underfill slightly than to overfill. Rap the syringe to get any sizeable air bubbles to the top, then very gently push the plunger to push the air out.
- Inject the Ink: Carefully insert the syringe needle into the correct fill hole. The needle should penetrate the sponge inside. Slowly and steadily push the plunger to inject the ink. If ink starts to bubble out of the hole, stop immediately—it’s full. Do not force extra ink in, as this will cause leaks.
- Seal and Clean: After filling, retract the syringe gently. Wipe the cartridge top with two pieces of paper so that excess ink can be eliminated. Cover the fill hole with a piece of clear tape or a little hot glue. Leave the vent slit uncovered; this is a small, maze-like channel in the label; the cartridge needs this to breathe.
- Reinstall and Test: Replace the cartridge in your printer. It ought to snap into place strongly. Put the lid on the printer. The chip is not reset, and your printer might still give a low ink warning. This is to be expected. This can usually be done by simply pressing the Stop or Resume button down hard for 5-10 seconds.
- Run a Cleaning Cycle: Some printers have a cleaning cycle that is run through the maintenance menu of your printer (either on your computer or on the printer). This will aid in priming the cartridge and other outflow of any air bubbles. Take a print of a nozzle check pattern so all the colors are printing.
Guide 2: How to Refill Canon TONER Cartridges (For Laser Printers)
A toner cartridge takes more mechanical work to reload as opposed to an ink cartridge, and is a task that makes use of fine powder. Use a dust mask where there is good air ventilation.
Source: Electronics&Computers
Tools & Materials Needed for a Toner Refill
- Toner Refill Bottle: The Canon printer cartridge refill bottle should be composed of the appropriate toner formulation for your particular Canon printer. Printing with the incorrect type of powder may result in low print quality and make you ruin your printer.
- Funnel Cap: A particular cap that is screwed on the toner bottle in order to pour accurately.
- Toner Chip (if required): A majority of Canon cartridges have a smart chip, which needs to be replaced in order to allow the printer to know that it is using a refilled cartridge. Read to see whether your model will need it.
- Screwdriver and Pliers: To open the cartridge.
- A “Hole-in-One” or Soldering Tool (optional): Some models are better at melting a clean hole than disassembling.
- Toner Vacuum or a Damp Cloth: For cleanup. Do not use a regular vacuum, as it can disperse the fine toner particles into the air.
How to Refill Canon Cartridge: The Step-by-Step Process
- Prepare the Cartridge: Take out the toner cartridge from your printer. Bring it to your prepared place of work. Shake the cartridge side-to-side carefully so as to mix the remaining toner as evenly as possible.
- Locate and Open the Fill Hopper: The way into the toner hopper depends on the model.
- Disassembly Method: It might require that you unscrew some screws on the side of the cartridge to remove the end-cap so that the hopper plug is exposed.
- Melt-and-Pour Method: It is a quicker process to certain sealed cartridges whereby a special heated device melts a neat and round hole into the hopper container.
- Empty the Waste Toner: This is a very important thing lot of people overlook. This cartridge has a special chamber where waste toner is stored during the process of printing process. You need to empty this before it spills and leaves stains and smudges on your pages. Find the waste chamber plug, pop it out, and pour out the old toner into a newspaper to dispose of.
- Fill the Hopper: Insert the funnel cap into your new bottle of toner. On the funnel, insert into the fill hole and carefully pour the new toner slowly. Do not press on the bottle since it forms a cloud of toner dust. Do not overfill, so fill it up till the brim becomes approximately 90% to avoid overfilling problems.
- Reseal the Cartridge: Properly close the Cartridge back up. Use the supplied high-temp tape or plastic plug to seal the hole if you melted a hole in it.
- Replace the Chip: In case your cartridge is a smart chip, you have to very carefully pry off the old one and slide on the new one. It is normally placed at the end of the cartridge and with easy access.
- Clean and Reinstall: Wipe down the entire cartridge with a toner cloth or a wet (not damp) paper towel in order to remove any errant toner powder. With a gentle motion back and forth, a few times, shake the cartridge to spread the powder new. Install a copy of it in your printer.
- Test Print: Print some test pages and find out that everything is going on well. The first prints could be slightly shallow, but will soon balance to give sharp black text.
Exploring Alternatives: Refill vs. Compatible vs. OEM Cartridges
DIY refilling can be the best thing that befalls someone, but it is not the only option to save money. In order to make the best decision, it is beneficial to set the three major options that include: Do-it-yourself Cartridge refills, purchase matching cartridges, or remain with Original Equipment Manufacturer (OEM) cartridges alongside each other.
| Feature | OEM Cartridge | DIY Refill | Compatible Cartridge |
| Upfront Cost | Highest | Lowest | Low |
| Cost Per Page | Highest | Lowest | Low |
| Print Quality | Guaranteed Excellent | Variable (Good to Poor) | Consistently Good to Excellent |
| Convenience | Highest (Plug & Play) | Lowest (Requires Time & Effort) | High (Plug & Play) |
| Risk of Failure | Very Low | Moderate to High | Low |
| Success Rate | ~100% | ~80-90% (with experience) | ~98-99% |
The Toner Master Advantage: Quality Consumables for ANY Canon Printer
High-quality compatible cartridges prove to have a sweet spot with many users. It is here that the expertise of a manufacturer will be your trump card. Consider having the convenience and reliability of an OEM cartridge at a much more affordable price, which is nearly half the cost of a DIY refill. That is what we do at Toner Master.
You want your DIY refill to turn out well after time and effort have been expended. We have more than 17 years in trying to perfect the science of printer consumables. We have three pillars to our advantage:
- Amazing Prices: Why bother refilling when you can also obtain a brand new, professionally manufactured compatible cartridge for frequently less than a third of the OEM price? You achieve huge discounts without the effort.
- Inconsistency Unmatched: Our cartridges are not hand-packed. They are produced on 30 fully automated production lines that have almost zero error output. The result is not only that each individual cartridge (ink or toner) is constructed to the finest detail, but that you will have consistent, high-quality pages from the first page to the very last page.
- The No-No-Hassle Solution: You obtain the feel of the plug-and-play OEM cartridge. Nothing to spill, nothing to waste, nothing to clean using gloves. All one has to do is open the box, plug in the cartridge, and resume printing. A huge range of virtually all Canon printer models makes us the one-stop shop for a more intelligent printing choice.
Troubleshooting: Common Refill Problems & Solutions
You could have problems after a refill, no matter how you worked thoughtfully. This is the way to resolve the most widespread issues.
For Inkjet Cartridges:
- Problem: The printer doesn’t recognize the cartridge.
- Solution: This is normally a chip problem. Remove the cartridge and then clean the copper contacts on the cartridge using a clean (no lint) lint free cloth gently. Install it again hard. Probably it could be the state of the empty status, which is locked onto the chip. To override the ink monitoring, pressing and holding the 10-second your printer’s stop, cancel, or resume button will resume printing.
- Problem: Prints are streaky, or a color is missing.
- Solution: This shows that the print head is clogged or air is in the cartridge. Just do 2-3 head printhead cleans through your printer utility menu. Failing that, unplug and unplug/replug the cartridge and softly blot with a paper towel, face down on the print head area of the bottom. You will now observe a little piece of ink. Otherwise, the clog can be serious, and the cartridge may require replacement.
For Toner Cartridges:
- Problem: Pages have gray smudges, lines, or spots.
- Solution: This almost always comes about due to failure to empty the waste toner hopper or by overloading the main hopper. The only remedy is to get back into the process, and this time ensure that the waste chamber is emptied out completely. It may also be induced by a scratched drum unit, whereby the cartridge will have to be replaced.
- Problem: “Toner Low/Empty” error persists after refill.
- Solution: This implies that either the toner chip was not replaced or was not installed properly. Make sure that you use the correct chip corresponding to your model, which should be firmly sitting in its slot. Without the reset or a new chip, the printer will not recognize the refill.
Conclusion
The world of printer consumables has a lot to do with complexity, yet it does not need to feel so. As we have seen, you can take these massive options and have your printing costs back in your control. The journey with the DIY Canon cartridge refill is fulfilling to those who are least concerned with spending a bit of time to acquire the know-how and to the do-it-yourself user who is conscious about their budget, and mostly with a taste for a greener environment. Armed with the comprehensive instructions given, you are in a good position to go about this task with success.
Nevertheless, it is also essential to understand that your time is valuable and that print demands the highest quality. You do not need to face a dilemma of investing in OEM cartridges, which are so expensive, as well as a DIY project, which might be too much trouble. The third and most effective way is the high-quality compatible cartridges of a reputable company like Toner Master, the smart and reliable, and ultra-economical way of delivering the best of both worlds. Regardless of the direction you follow, now you have the knowledge to make the right decision regarding what will suit your needs, your budget, and your printer.